
The original mapleMaker Mini 3D printer. Download the archive release below.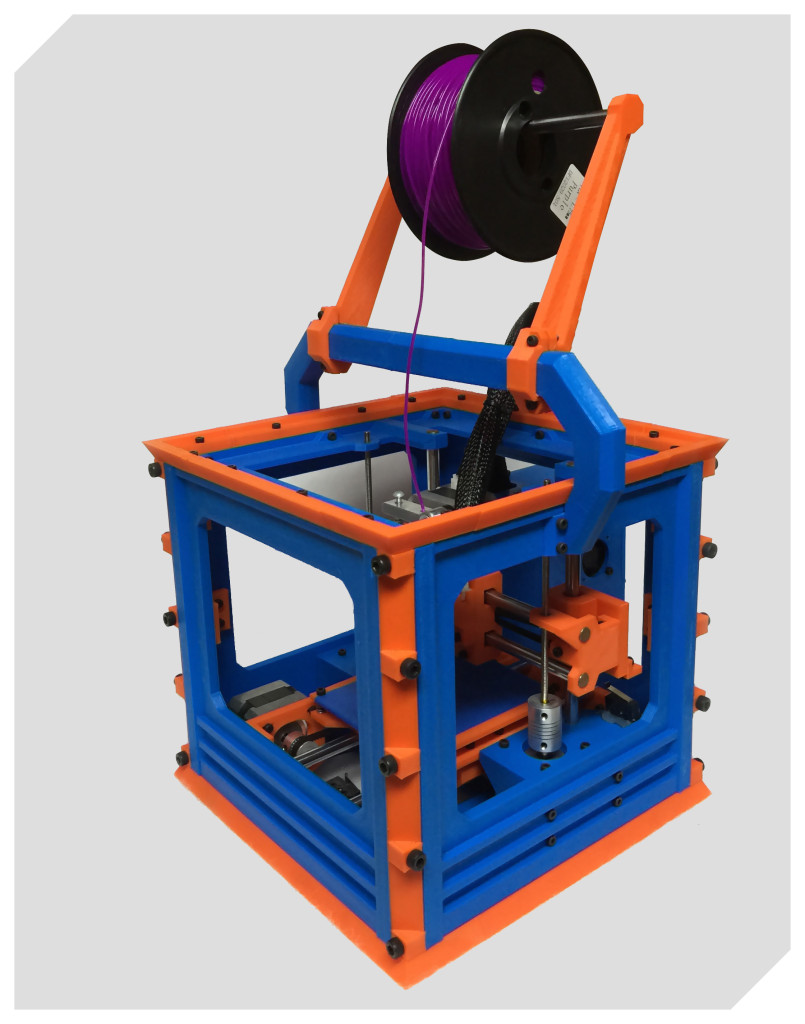
Download the source from YouMagine
Overview
The MaplePrint Mini is our first RepRap designed printer. The primay goal was to develop a printer that replaces the traditional rods, or laser cut frames with entirely 3d printed parts, without losing rigidity or strength. The second goal was to create a printer with a foot print much larger than 200x200x200mm, thus being printable on most 3d printers with a 200mm build volume. The overall print volume is slightly less than 100x100x80mm. With some creative engineering and swapping the extruder to a bowden set up, you could squeeze even more out of it, or modify the frame to be even larger and print bigger.
Build Notes
This is the initial release of the files and source materials for this printer. There is no complete build guide available at this time. However, I think you’ll find the parts to be labeled clearly and the build straight forward enough. Build the outter frame, top and bottom frames, and then work your way inwards, Y axis, Z axis, and then drop your X axis in place. Most pieces on this build will only go together one way.
Printing Notes
The included STLs are ready to be sliced by your favourite slicer. In the prototype, the pieces were printed in PLA plastic, with a 0.4 nozzle, with a 0.3 layer height. Print speeds vary depending on the part, and your printer, but average around 60-70mm/s. There are a lot of parts, the frame pieces alone will account for most of the printing time. Don’t be surprised if it takes 60+ hours to print all the pieces. Note that each file name has the quantity needed for that specific part. In most cases, this is usually 1, but for some parts, there will need to be multiples of it printed.
Hardware Notes
We will admit, we went a bit crazy on screws and mountings. You are going to need a lot of screws. Thankfully, there are only 3 sizes used on the printer. The outter frame uses M5x20 cap screws, while most everything else uses M3x10 cap screws. There are several M3x20 used for the bed, and idlers on the X and Y axis. Stock up though, you will need about 30 M5, and about 150 M3x10s. All of the printed pieces’ screw holes were designed to thread the screw into without any tapping or post work. You shouldn’t need to reem or clean out the holes if your printer is well calibrated.
Mechanical Notes
Aside from the printed parts, the printer uses a standard assortment of pieces. In addition to the printed parts you will need 8mm linear rod. The lengths are: Z: 191mm X: 193mm Y: 200mm. You will need 2 pieces for each axis. The threaded rod is 5mm, and will need to be cut to 133mm in length.
Standard 5mm couplings are used to connect the z motors to the threaded rod.
The linear bearings used in this printer are of the LM8SUU type. These are your standard 8mm bearing, but are shorter, at only 17mm in length. You will need 12 of these.
The motion is provided by GT2 belts with 20 tooth pulleys. You will need 2 pulleys and 1 meter of belt.
The steppers used for this printer are the smaller 36oz type. These are used due to space constraints. You will need 5 of these.
End stops are of the switch type and can be of any size or shape that you like, so long as it fits. There are small platforms on each of the axis’ designed to mount a switch too. In my case, hot glue works wonders, and has proven to hold well. You will need 3 of these.
Extruder Notes
The extruder and hot end were sourced from Printrbot. The extruder used was their all metal extruder, which I used for its compact nature, and had one on hand. There are also other direct drive extruders, including a printable version of the printrbot extruder available on Thingiverse. You can adapt the extruder base plate to accept whichever you prefer.
The Hot End is Ubis hot end, which again, was something I had on hand. A typical J-Head should work fine with this set up too. Note, that due to the way the extruder is mounted to the carriage, shorter hot ends may not clear the bottom of the X axis. In this case, you may want to revise the extruder carrier or use the included CAD files and find the other base that was designed. This will move the extruder motor from on-top of the X axis, to in front of it, but should allow you to re-position things so that hot ends such as the e3d or Hexagon to be used.
Electronics Notes
Electronics wise, the printer uses a standard RAMPS 1.4 install with Eric Zalms Marlin firmware: https://github.com/ErikZalm/Marlin/
We have included a quick and dirty config.h to get you up and running. Power wise, I used a cheap 12v laptop style brick to bring things to life.
Parts list
This is by no means a complete list of every part you will need, but as this is the first release, its a quick and dirty summary of the parts used. For this project, most parts were sourced through www.FolgerTech.com, and www.printrbot.com. Screws came from Fastenal and local suppliers. I will revise this list in future revisions.
- M5x20 (30)
- M3x10 (150)
- M3x20 (8)
- 8mm Linear Rod (1 meter should do)
- 5mm threaded rod (500 mm will do)
- GT2 Pulley, 16 or 20 tooth (2)
- GT2 Belt (6mm) (1 meter)
- 5mm to 5mm couplings (2)
- NEMA 17 36oz motors (5)
- 5mm bearings (5 or so)
- 8mm LM8SUU linearing bearings (12)
- RAMPS 1.4 (1)
- Arduino Mega 2560 (1)
- Polulu Stepper drivers (4)
- 30mm fans (3) (digikey has these)
- Micro switches (3)
- Hot end (Ubis recommended) (1)
- Printrbot Metal Extruder (1)
Misc
Note on CAD:
The CAD drawings were originally drawn in AutoCAD 2013, and contain everything that was used. There are 2 included CAD files. The first, MaplePrint_Mini_R_Plate is the primary file, this contains every component of the printer laid out in ‘plated’ format, that is, every part is rotated and postioned for printing. This also includes the latest revision of parts. The second file, MaplePrint_Mini_R, is mainly a visulation of the entire printer assembled, and DOES NOT include the latest revisions of some parts. While there are not major differences between the newsest revisions and older, it is best to always use the Plate file when editing or viewing a part.
If we have forgotten anything or you need to know anything more, drop me a message on Twitter, at @mapleMakerMedia. We hope you enjoy the build and the printer as much as we have, and we hope you’re excited to see what is coming next!